
Most people use Claude for event planning the same way. They ask for a checklist, maybe some invite wording, and then they copy it all into another app by hand.
That’s the slow part. And it’s where parties stall.
Here’s the thing: Claude can now do the boring part for you. Connect it to Mixily, describe your event in one sentence, and Claude builds the actual RSVP page. Title, time, location, description, cover photo. It can even draft your invites. You just approve them.
This guide walks you through it, start to finish. It takes about five minutes.
What Claude Can Do for Your Event Planning
On its own, Claude is a great brainstorming partner. It can’t host anything, though. There’s no page for guests to open and no place for RSVPs to land.
With the Mixily connector, Claude can:
- Create the event page from a plain sentence like “a 40th birthday at my place on Saturday at 7.”
- Edit it when plans change (“move it to 7:30 and add a dress code”).
- Set a cover photo from a link or a picture on your computer.
- Read back your RSVP counts so you know who’s coming.
- Find your usual guests and reuse the list from your last party (paid plans).
- Draft invites for you to approve (paid plans).
Creating and editing events through Claude is free. Finding guests and drafting invites come with any paid Mixily plan.
Step 1: Connect Mixily to Claude
You only do this once.
- In Claude, open Customize, then Connectors.
- Add a custom connector and paste this address: https://mcp.mixily.com
- Click Connect. Sign in to your Mixily account and click Allow.
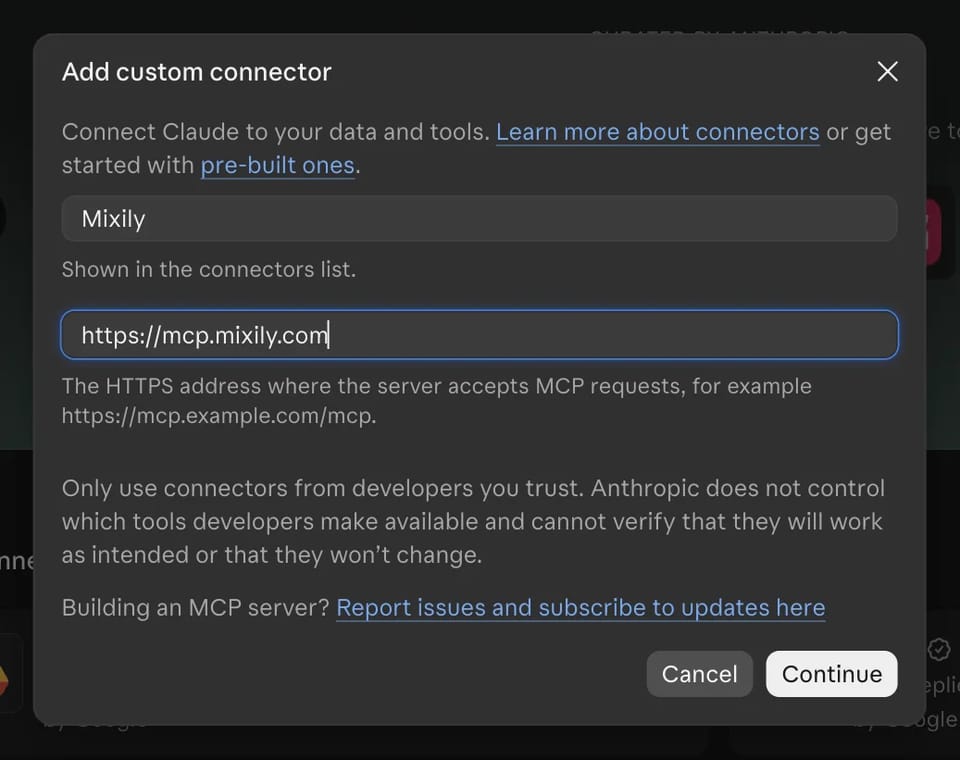
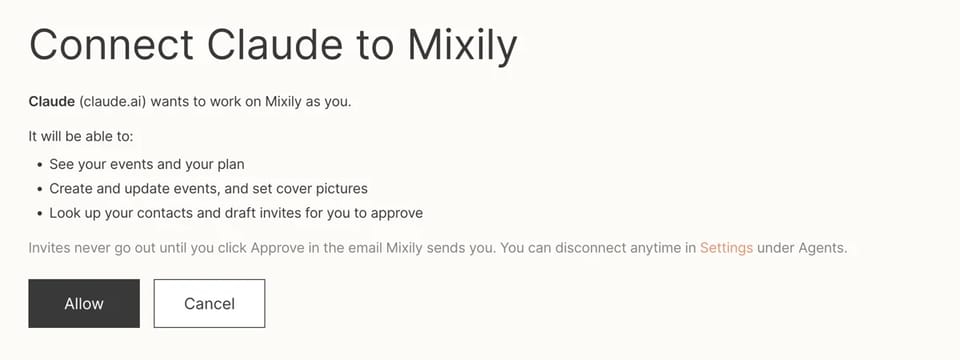
Claude never gets your Mixily password. It gets its own key, and you can switch it off anytime in Mixily under Settings, then Agents.
Using Claude Code instead? Run `claude mcp add –transport http mixily https://mcp.mixily.com` in your terminal, start Claude, and type `/mcp` to sign in.
Step 2: Describe Your Event in One Sentence
Don’t overthink it. Talk to Claude like you’d text a friend.
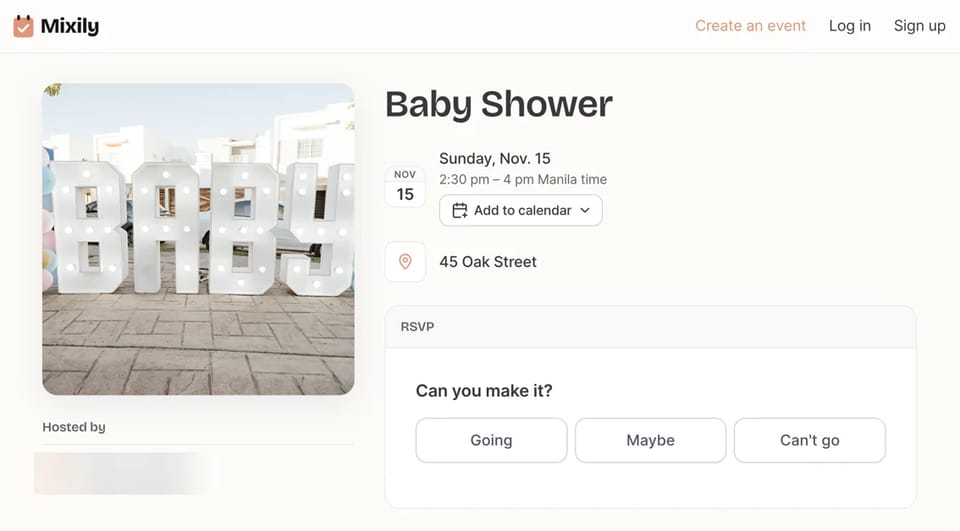
Make a Mixily event for my sister’s baby shower. Sunday the 15th at 2pm at my place, 45 Oak Street. Keep it to invited guests only. Write a short, warm description and ask people to bring a children’s book instead of a card.
Claude checks your account first (your timezone, your existing events) so it doesn’t ask you things Mixily already knows. Then it creates the page and tells you what’s still missing.
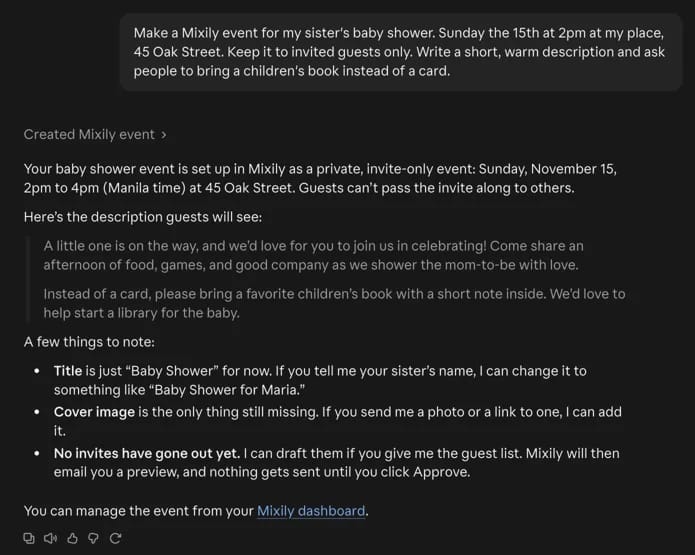
In our test, Claude showed us the description it wrote, confirmed guests can’t pass the invite along, and flagged what was left: a cover photo and the guest list.
Step 3: Tweak It in Plain Words
Plans change. That’s fine. Just say so.
Push it to 2:30 and add “Parking is on the street” to the description. Don’t change anything else.
Use this photo as the cover: (paste an image link)
Claude only changes what you ask for. Then it reads the page back so you can check it.
Step 4: Let Claude Draft the Invites (You Approve)
This is our favorite part.
Invite my sister at [email protected].
You can also say “invite the same people as my last dinner party” and Claude pulls the guest list from that event. Either way, Claude drafts the invites. Nothing is sent yet. Mixily emails you a preview of the list with an Approve button. Only that click sends them.
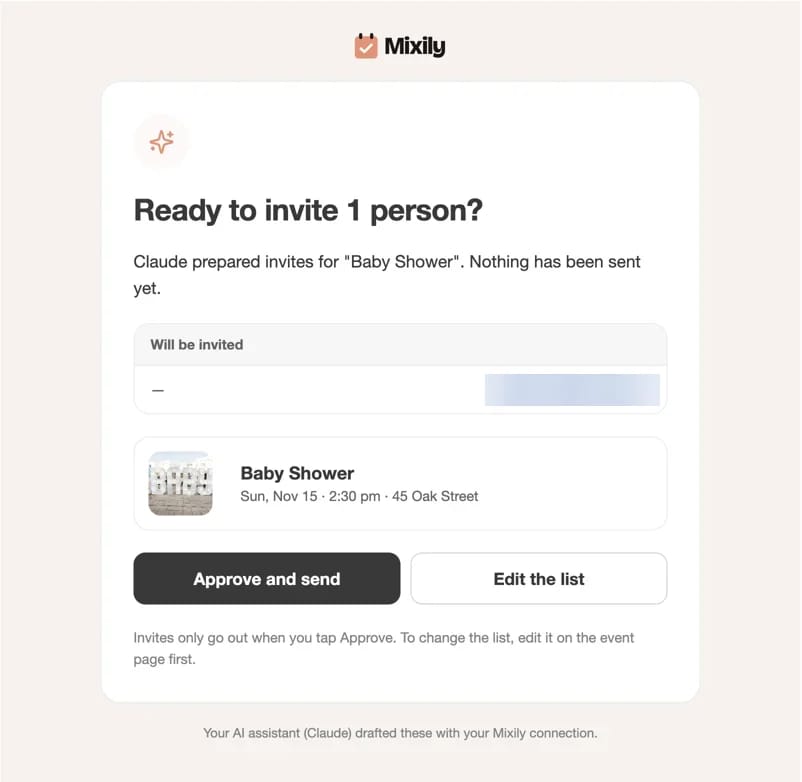
So if Claude adds the wrong Jane, you catch it before anyone gets an email. You can also tell Claude to take someone off the list before you approve.
Claude Prompts for Event Planning You Can Copy
A few prompts that work well with the Mixily connector:
- Birthday: “Make a Mixily page for my 40th. Saturday at 7 at The Corner Bar, 120 Main St. Fun, short description. Cap it at 30 guests.”
- Holiday party: “Set up our office holiday party on Mixily. Friday December 18, 6 to 9pm. Private, invited guests only.”
- Client night: “Create a client appreciation evening on Mixily for next Thursday at 6. Invite everyone from last year’s event, and show me the list before anything goes out.”
- Check-in: “How many people have said yes to my baby shower so far?”
- Clean-up: “Cancel the test event I made earlier.” (Claude asks you to confirm first.)
Want more? We put together a full list of ChatGPT event planning prompts that also work in Claude.
Is It Safe to Let Claude Plan My Event?
Fair question. Here’s what Claude can and can’t do.
create, edit and read your own events, and draft invites for you to approve.
send invites without your click, see other people’s events, sell tickets, or change your account settings.
And you can disconnect it in one click under Settings, then Agents.
Common Questions About Claude Event Planning
Can Claude create an event and invite my guests?
Yes, once you connect Mixily. Claude creates the event page from your description. On a paid plan it can also draft invites to people from your contacts or past events, which you approve by email.
Do I need Claude Pro?
No. Custom connectors work on every Claude plan, including Free, which allows one custom connector. On a Team or Enterprise plan, an owner adds Mixily for the organization first, then each person connects.
Does it work with ChatGPT too?
Yes. The same connector works in ChatGPT, Claude Code, Cursor and other assistants that support remote connectors. See the AI event planner page for setup steps.
Try Claude Event Planning on Your Next Party
Create a free Mixily account, connect it to Claude, and describe your event. Your RSVP page is one sentence away.
Set up the AI event planner. Questions? Email [email protected].