Outdoor parties have one big advantage over indoor ones: the setting is already doing the work for you.
There’s something about being outside — the fresh air, the natural light, the open sky — that puts people in a good mood before the first guest arrives. I’ve hosted backyard gatherings for 15 people and block parties for 80. The vibe outside is different. People wander. They pick up a lawn game. They sit in the grass and have conversations that wouldn’t happen at a crowded indoor party.
But outdoor party planning does come with variables that indoor parties don’t. Weather. Bugs. Heat. Noise ordinances. Neighbors. The host who plans for these wins. The host who ignores them ends up scrambling.
Here’s how to plan an outdoor party that actually works.
Key Takeaways
- Always have a rain plan — decide it in advance, not on the day of the party
- Shade for 75% of seating is the minimum in summer; people leave when they’re too hot
- Bug control starts at the table level, not yard-wide — a citronella candle on every table beats one big torch
- Tell neighbors in advance — a quick heads-up prevents a 10 PM noise complaint
- Send RSVPs early so you know your headcount before buying food or renting equipment
Step 1: Pick Your Date and Lock In a Rain Plan
This is the single most important decision in outdoor party planning. If your entire event depends on perfect weather and you haven’t thought about a contingency, you’re gambling with your guests’ Saturday.
Here’s how I handle it: I check a 10-day forecast the week before, then again 72 hours out, then the morning of. Modern weather apps are accurate for short windows. If there’s a 40%+ chance of rain in the two-hour window your party starts, I activate the rain plan — I don’t wait and hope.
What your rain plan actually needs to be:
- Light drizzle: Most guests push through if there’s some cover. A canopy over the food table handles it.
- Steady rain: You need a tent rental ($75–$150 for a 10×10 canopy) or indoor overflow space.
- Thunderstorm: Move indoors. Full stop. No negotiation.
- 95°F+: Shade becomes a survival issue. Add fans, double the water supply, and shorten the outdoor portion.
Put your rain plan in the invitation. Guests appreciate knowing what to expect. Something like: “If it rains, we’ll move to the garage — party’s happening either way.” That one sentence eliminates anxiety for everyone.
Use Mixily to send your invitation and collect RSVPs — knowing your headcount before you buy food or rent equipment saves real money. Get your RSVPs confirmed at least a week out so you can plan accurately.
Decide your rain plan before the day of the party and communicate it in the invitation. “If it rains, we move to the garage” removes stress for you and your guests.
Don’t wait until the morning of the party to check the weather and figure out your backup plan. By then it’s too late to rent a tent or message 30 guests.
Step 2: Map Your Outdoor Space Into Zones
Before you set up a single chair, walk your yard or outdoor venue and decide where everything goes. This is one of the most underrated parts of outdoor party planning — and one most people skip.
Every outdoor party needs at least four zones:
Arrival zone: The first thing guests see. A simple balloon cluster, a welcome sign, or a few potted plants with a directional arrow sets the tone. It also prevents people from wandering to the wrong side of the yard looking for the party.
Food zone: Accessible from everywhere, but not right next to the grill (smoke, heat). Set it up so guests flow in one direction — appetizers at one end, mains in the middle, drinks at the other end. This prevents bottlenecks.
Seating zone: Arrange tables so people face each other, not a fence or wall. Mix table sizes — some large group tables, a few two-tops — so guests choose their comfort level. Don’t cluster all the seating in one corner. Spread it through the space so conversations happen in different parts of the yard. See our party hosting tips for how to arrange seating that actually gets people talking.
Activity zone: Lawn games, a dance area, a photo spot. Keep this separated from the eating zone so movement and energy feel different in each area. Cornhole, bocce, and giant Jenga all work great and cost $30–$60 each.
If kids are coming, add a fifth zone: a designated children’s activity area, away from the main adult flow. Parents will thank you specifically for this one.
Step 3: Solve the Shade Problem (Most Hosts Get This Wrong)
A hot afternoon with no shade will drive guests indoors within an hour. I’ve watched it happen at parties that had great food, great music, and zero shade. People just quietly disappear.
The rule: at least 75% of your seating should be in shade during peak afternoon hours (noon to 3 PM). Here’s how to hit that:
- Natural shade from trees: The best kind. Position your main seating under existing tree coverage if you have it.
- Pop-up canopies: $30–$80 each. Work well for tables of 4–6. Buy or rent a few and position them over your main seating clusters.
- Market umbrellas: Great for dining tables. Most outdoor dining sets come with one, but buy extras if you’re seating 20+.
- Event tent rental: For 30+ guests, a rented event tent ($100–$300 for a day) creates a consistent shade zone that doubles as rain cover.
Also: fans. A box fan or two pointed at the main seating area makes a 90°F day feel 10 degrees cooler. They also discourage mosquitoes — which is a bonus.
Step 4: Outdoor Party Food and Drink Logistics
Food behaves differently outside than it does inside. The heat, the sun, and the bugs all create challenges that don’t exist in a kitchen. Here’s what changes:
Keep cold food cold. Food sitting in direct sun goes bad faster than you’d think. Keep anything cold in coolers or on ice until serving time. The standard safety rule: no dish should sit out for more than 2 hours total (1 hour if temperatures are above 90°F).
Cover everything. Mesh food covers ($15–$25 for a set) are one of the best $20 investments in outdoor party planning. They keep bugs off food and slow down food drying out. Buy a set before your first outdoor party and you’ll use them forever.
Plan for more drinks. People drink significantly more when they’re outside in the heat. My rule: 2–3 drinks per person per hour for outdoor summer parties, versus 1–2 for indoor. Always have water prominently available — not just as an afterthought, but in a large clearly-marked cooler or dispenser that’s easy to find.
Position the grill downwind. Smoke drifting into the seating area kills conversations fast. Walk around your space on a typical afternoon to see which direction wind usually comes from, then position your grill on the opposite side of the yard from your main seating.
If you’re figuring out dietary restrictions in advance (which you should), collecting dietary needs before the party prevents last-minute scrambling at the food table.
Set out mesh food covers on every dish. They cost $20 for a full set and are the single most practical outdoor party purchase you’ll make.
Don’t let dishes sit uncovered in direct sun for hours. Food safety aside, uncovered outdoor food dries out fast and attracts every bug in your yard.
Step 5: Beat the Bugs
This is the detail that separates experienced outdoor hosts from first-timers. Bug management isn’t something you deal with when guests start complaining — it’s something you set up before the party starts.
What actually works:
- Citronella candles on every table — they work, but only in a small radius, so one per table is the move, not one big torch for the whole yard
- A spray bottle of bug repellent on an obvious surface near the entrance — guests will use it without being asked
- Box fans pointed at seating areas — moving air discourages mosquitoes significantly
- Mosquito coils or torch-style repellents around the perimeter of the yard
- Bug zappers, positioned away from the main seating area (the noise is annoying)
Even if your neighborhood “doesn’t really have mosquitoes,” a summer evening outdoor party will have them. Plan accordingly.
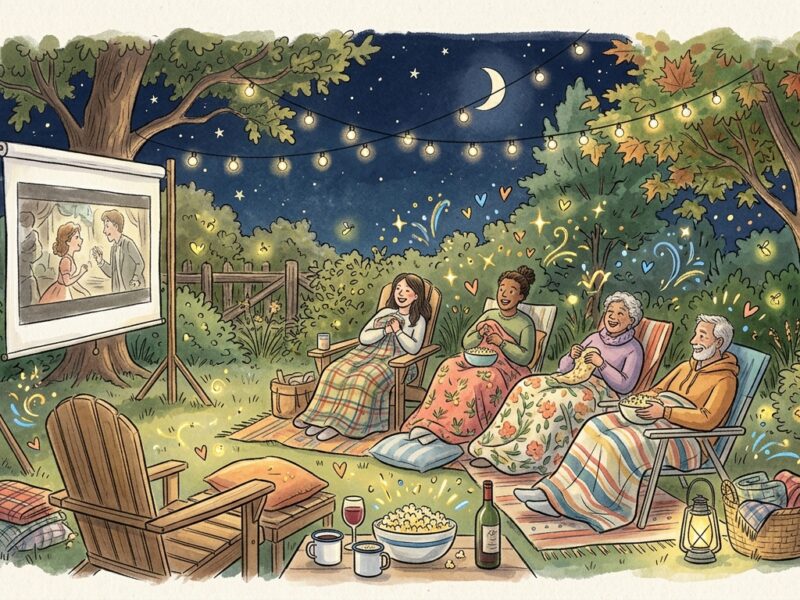
Step 6: Lighting for Evening Events
If your party runs into the evening — and the good ones usually do — you need a lighting plan. The moment natural light fades, an unlit outdoor space loses its atmosphere fast.
String lights are the most effective outdoor party investment available. Run them along fences, draped over trees, or hung between poles. Warm white creates a golden, flattering atmosphere. A 50-foot set costs $20–$30 and completely transforms any outdoor space. I put these up for every outdoor party I host.
Candles and lanterns on tables add intimacy. Pillar candles in hurricane glasses work well. If wind is an issue, use battery-operated candles — same look, no fire risk.
Path lighting is practical and appreciated. If guests are walking through a dark yard to reach the bathroom or parking, a few solar-powered path lights solve the problem cheaply. Pick them up for $15–$20 at any hardware store.
Uplighting — spotlights aimed upward at trees or along fences — adds depth and drama. This is more effort but looks stunning in photos if you care about that.
Step 7: Talk to Your Neighbors First
This step is easy to skip and surprisingly important.
A quick heads-up to your immediate neighbors before the party — not a formal warning, just a friendly “hey, we’re having people over Saturday afternoon, should wrap up by 9 PM” — does three things:
- It prevents a noise complaint at 8:45 PM when the party’s at its peak
- It gives neighbors a chance to mention if they have something early Sunday morning (and adjust your end time accordingly)
- It builds goodwill — some neighbors will appreciate the invite
Know your local noise ordinance. In most US cities, it’s 10 PM on weeknights and 11 PM on weekends. But many neighborhoods have stricter HOA rules. Check before you plan a late night.
If you’re using speakers, face them toward your house and away from the property line. Speaker direction matters more than volume for neighbor noise — a speaker facing away from neighbors at medium volume is less disruptive than a speaker facing the fence at low volume.
Tell your neighbors in advance — a 30-second conversation prevents a 10 PM noise complaint. Some neighbors will even be glad you invited them.
Don’t assume your neighbors are fine with loud music until midnight. A surprise noise complaint mid-party is a stress you don’t need — and it’s completely avoidable.
Step 8: Plan Cleanup Before the Party Starts
Nobody wants to think about cleanup before the party. But the hosts who plan for it in advance have a dramatically easier time at the end of the night.
Set up visible trash and recycling bins at multiple points around the party space — not just one bin in a corner. The rule: guests should never be more than 15 feet from a trash can. When bins are visible and accessible, guests use them. When they’re not, stuff ends up on tables, in the grass, and on chairs.
A few things to prep before the first guest arrives:
- Large trash bags — at least twice as many as you think you need
- A recycling bin clearly labeled (people will use it if they know it’s there)
- Paper towels and a spray bottle of cleaner in an accessible spot for spills
- A designated “return” area near the entrance for chairs, coolers, and borrowed equipment
End time matters too. Build 30–45 minutes of cleanup time into your own party schedule. If the party ends at 8 PM, your mental plan should be “done cleaning by 9 PM.” Having that goal in mind keeps the teardown from stretching until midnight.
Outdoor Party Ideas Beyond the Backyard
You don’t need a backyard. Great outdoor parties happen in lots of settings.
Public parks: Most cities have pavilions and picnic areas you can reserve. Check your city’s parks and recreation website — permits are often cheap or free, and many include picnic tables, covered areas, and sometimes even grills.
Rooftops: If you live in an apartment building, ask management if the rooftop or shared terrace is available for private events. This is an underused option in cities. Many buildings will say yes, especially for weekend afternoon events.
Beaches and lakefronts: Many waterfront areas allow gatherings with a simple permit. Check requirements for alcohol and group size before you plan.
Private campgrounds: For longer outdoor events or overnight gatherings, many campgrounds rent group sites specifically designed for larger parties. This works especially well for birthday celebrations or friend group reunions.
Whatever venue you choose, the same principles apply: map your space into zones, plan for weather, solve shade and bugs, and get your party checklist sorted before the day of.
Outdoor Party Planning Checklist
Before the first guest arrives, run through this list:
- Rain plan decided and communicated to guests
- Shade covers 75% of seating (canopies, umbrellas, or natural shade)
- Bug repellent station set up near the entrance
- Citronella candles on each table
- Mesh food covers on all dishes
- Grill positioned downwind of main seating
- Water station clearly visible and easily accessible
- String lights hung and tested (if evening event)
- Path lighting in place for dark areas
- Trash and recycling bins placed throughout the space
- Neighbors notified
- Extension cords and outdoor power strip in place
- Plates and cups weighted enough to not blow away
- Sunscreen station near the food table for afternoon events
The Thing That Makes Outdoor Parties Work
Here’s the honest answer: it’s not the decorations or the perfectly curated food spread.
It’s the energy.
Outdoor parties feel expansive. People wander. They drift between conversations. They end up in the corner of the yard talking to someone they just met for forty-five minutes. That kind of spontaneous connection happens outdoors in a way it rarely does at crowded indoor parties.
Your job as host is to set up the physical conditions for that to happen — the shade, the lighting, the comfortable seating, the games — and then get out of the way. If you want your guests to mingle well, check out these party planning tips for how to structure the flow of an event so people actually connect.
The outdoors does the rest.
Frequently Asked Questions About Outdoor Party Planning
How far in advance should I plan an outdoor party?
For a backyard gathering of 20–30 people, 3–4 weeks is enough. For larger events (50+) requiring tent or equipment rentals, start 6–8 weeks out — rental companies book up fast in summer. Send your invitations at least 2–3 weeks before the date so guests can plan and you get a reliable headcount.
What should I do if it rains on the day of my outdoor party?
Activate your rain plan — which you already decided before the day of (see Step 1). If the rain is light, a canopy over the food and drink area usually handles it. Steady rain means moving inside or to a tent. Thunderstorm means everything moves indoors, full stop. Text guests at least 2 hours before start time if you’re making any changes to location or setup.
How do I keep bugs away at an outdoor party?
The most effective combination: citronella candles on every table (not just one big torch), a bug repellent spray station near the entrance, and fans pointed at seating areas. Moving air is the most underrated mosquito deterrent. For evening parties, consider mosquito coils around the perimeter of the yard.
What outdoor party food works best in the heat?
Foods that hold well in heat: grilled proteins served fresh off the grill, pasta salads with vinaigrette (not mayo), chips, crudités, and anything room-temperature-safe. Avoid mayo-based salads sitting in sun, cream-based dips, and anything with cheese that melts badly. Keep cold items in coolers until serving and use mesh covers on everything.
How many people can I fit in my backyard?
A general rule: allow 10–15 square feet per person for a standing cocktail-style party, and 20–25 square feet per person if everyone needs a seat. A standard 20×30 foot backyard (600 sq ft) comfortably holds 25–40 guests for a cocktail format, or 15–20 guests if fully seated at tables.
Ready to send invitations? Mixily makes it easy to create a free event page with all your outdoor party details — location, what to bring, your rain plan — and collect RSVPs so you know exactly who’s coming. Set it up in five minutes.
Related reading: How to Plan a Party: The Complete Guide | Housewarming Party Ideas | Spring Party Ideas